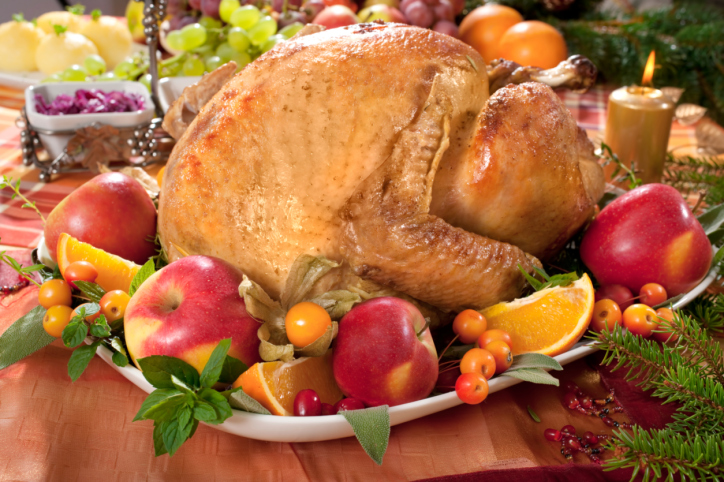
It’s Thanksgiving and this year, you have the most important task… (insert dramatic music here) Preparing the turkey!
It might seem like an intimidating job, but if you break it up into small steps, it can actually be the easiest dish on your cooking to-do list. Read on to learn everything you need to do to make a delicious turkey!
Phase 1: Gather Your Tools
Several days before Thanksgiving, start gathering all the things you’ll need. (Do this in advance so that if you find you don’t have a necessary item, you still have time to purchase it.) Here’s what you’ll need:
- Most importantly—you’ll need a turkey!
- A roasting pan
- A turkey baster (it looks like a giant eye dropper)
- A meat thermometer
- Olive oil or butter
- Salt
- Herbs (choose your favorites!)
- If you are stuffing your bird, you’ll want ingredients for stuffing which brings me to phase 2!
Phase 2: To Stuff or Not to Stuff?
Also a few days before Thanksgiving, you’ll need to figure out if you do or don’t want to stuff your turkey. This is a hotly debated topic in the kitchen realm—many chefs argue that we shouldn’t stuff turkeys because it can steal moisture from the meat itself, but others say it makes no difference.
If you want stuffing but don’t want to actually stuff your turkey, you can also make stuffing separately. Either way, if you want to include stuffing, you will likely need to gather the following basic ingredients (they often differ between recipes, but these are some of the typical things you’ll need):
- Stuffing bread
- Butter
- Chicken broth
- Herbs (whichever are your favorites)
- Onion
- Carrots
Looking for healthy stuffing recipes? Check these out! http://www.eatingwell.com/recipes_menus/collections/healthy_stuffing_recipes
Phase 3 (optional): Brining Your Turkey
If you intend to brine your turkey, you will need to do it the day before you cook the bird.
This is an optional step, but it can be a fantastic way to make your turkey pop with moist flavor. Brining is basically just “salting” the skin before cooking it. This process locks the moisture in the meat, making it much easier to keep your bird from drying out. Because a brined turkey will need to set 12 to 24 hours, be sure to brine it the day before you cook it.
- First, remove the giblets from the turkey.
- Next, cover the turkey (and, if possible, get underneath the skin) with about ½ teaspoon of salt per pound of meat.
- Put about ¼ of the salt inside the cavity of the bird. The rest of it goes outside of the turkey.
- Chill the turkey at least overnight, or for as long as 24 hours.
- When you remove the turkey from the fridge, pat it dry and leave it uncovered. This helps the skin dry out and will ensure that perfectly browned, slightly crispy skin.
Phase 4: It’s Turkey Day—time to prep your bird for the oven!
The big day has arrived and you want this bird to taste fabulous. What’s next?
- If you haven’t removed the giblets yet, you will want to do that now. Do this whether or not you intend to stuff your turkey.
- Take about 2 – 3 tablespoons of olive oil and sprinkle in all your favorite herbs (basil, oregano, thyme, garlic, etc.). Place most of it underneath the layer of skin covering the turkey breast. You can do this using a spatula or spoon—or, if you are brave enough, it’s often easiest to simply massage it in with your hands. Just be sure you wash your hands thoroughly before AND after!
- Spread the outside layer of turkey with whatever is left of the olive oil and herb mixture.
- Place the turkey into the roasting pan.
Phase 5: Roasting the Turkey
- Preheat the oven to 400 degrees before putting the turkey in.
- Once you are ready to place your bird in the oven, immediately turn it down to 375 degrees Fahrenheit.
- Bake the turkey 15 minutes for every pound.
- For optimum moistness, baste the turkey every half hour or so. (That just means taking the turkey baster—that tool that resembles a big eye-dropper—and soaking up the liquid on the bottom and squeezing it on top of your turkey.) Just remember that opening up the door to baste may increase the time it takes for the turkey to cook.
- Finally, to be safe, you will want to be sure that your turkey has reached the right temperature. Take the temperature from the thickest meat source—the thighs are usually the best spot. Make sure it has reached 165 degrees Fahrenheit before serving.
And you’ve finally reached the easy (and delicious) part… Carve, serve, and enjoy your turkey!
From all of us at Health Advocate, we hope you and your loved ones have a safe and enjoyable Thanksgiving.
If you’re a Health Advocate member with access to the wellness coaching program, reach out to your wellness coach for more healthy holiday cooking tips.
Have a question for a health advocate? Email nhess@healthadvocate.com and your question may be the topic of an upcoming “Ask a Health Advocate” column!


[…] Not sure how to prep and cook your turkey? We’ve got you covered. […]